How you grip the basketball is critical to a consistent release.
There are so many details that go into holding the ball and using each of the hands in order to become a great shooter.
If you can get consistently close to an optimal grip and release, then you stand an excellent chance of developing repeatable form.
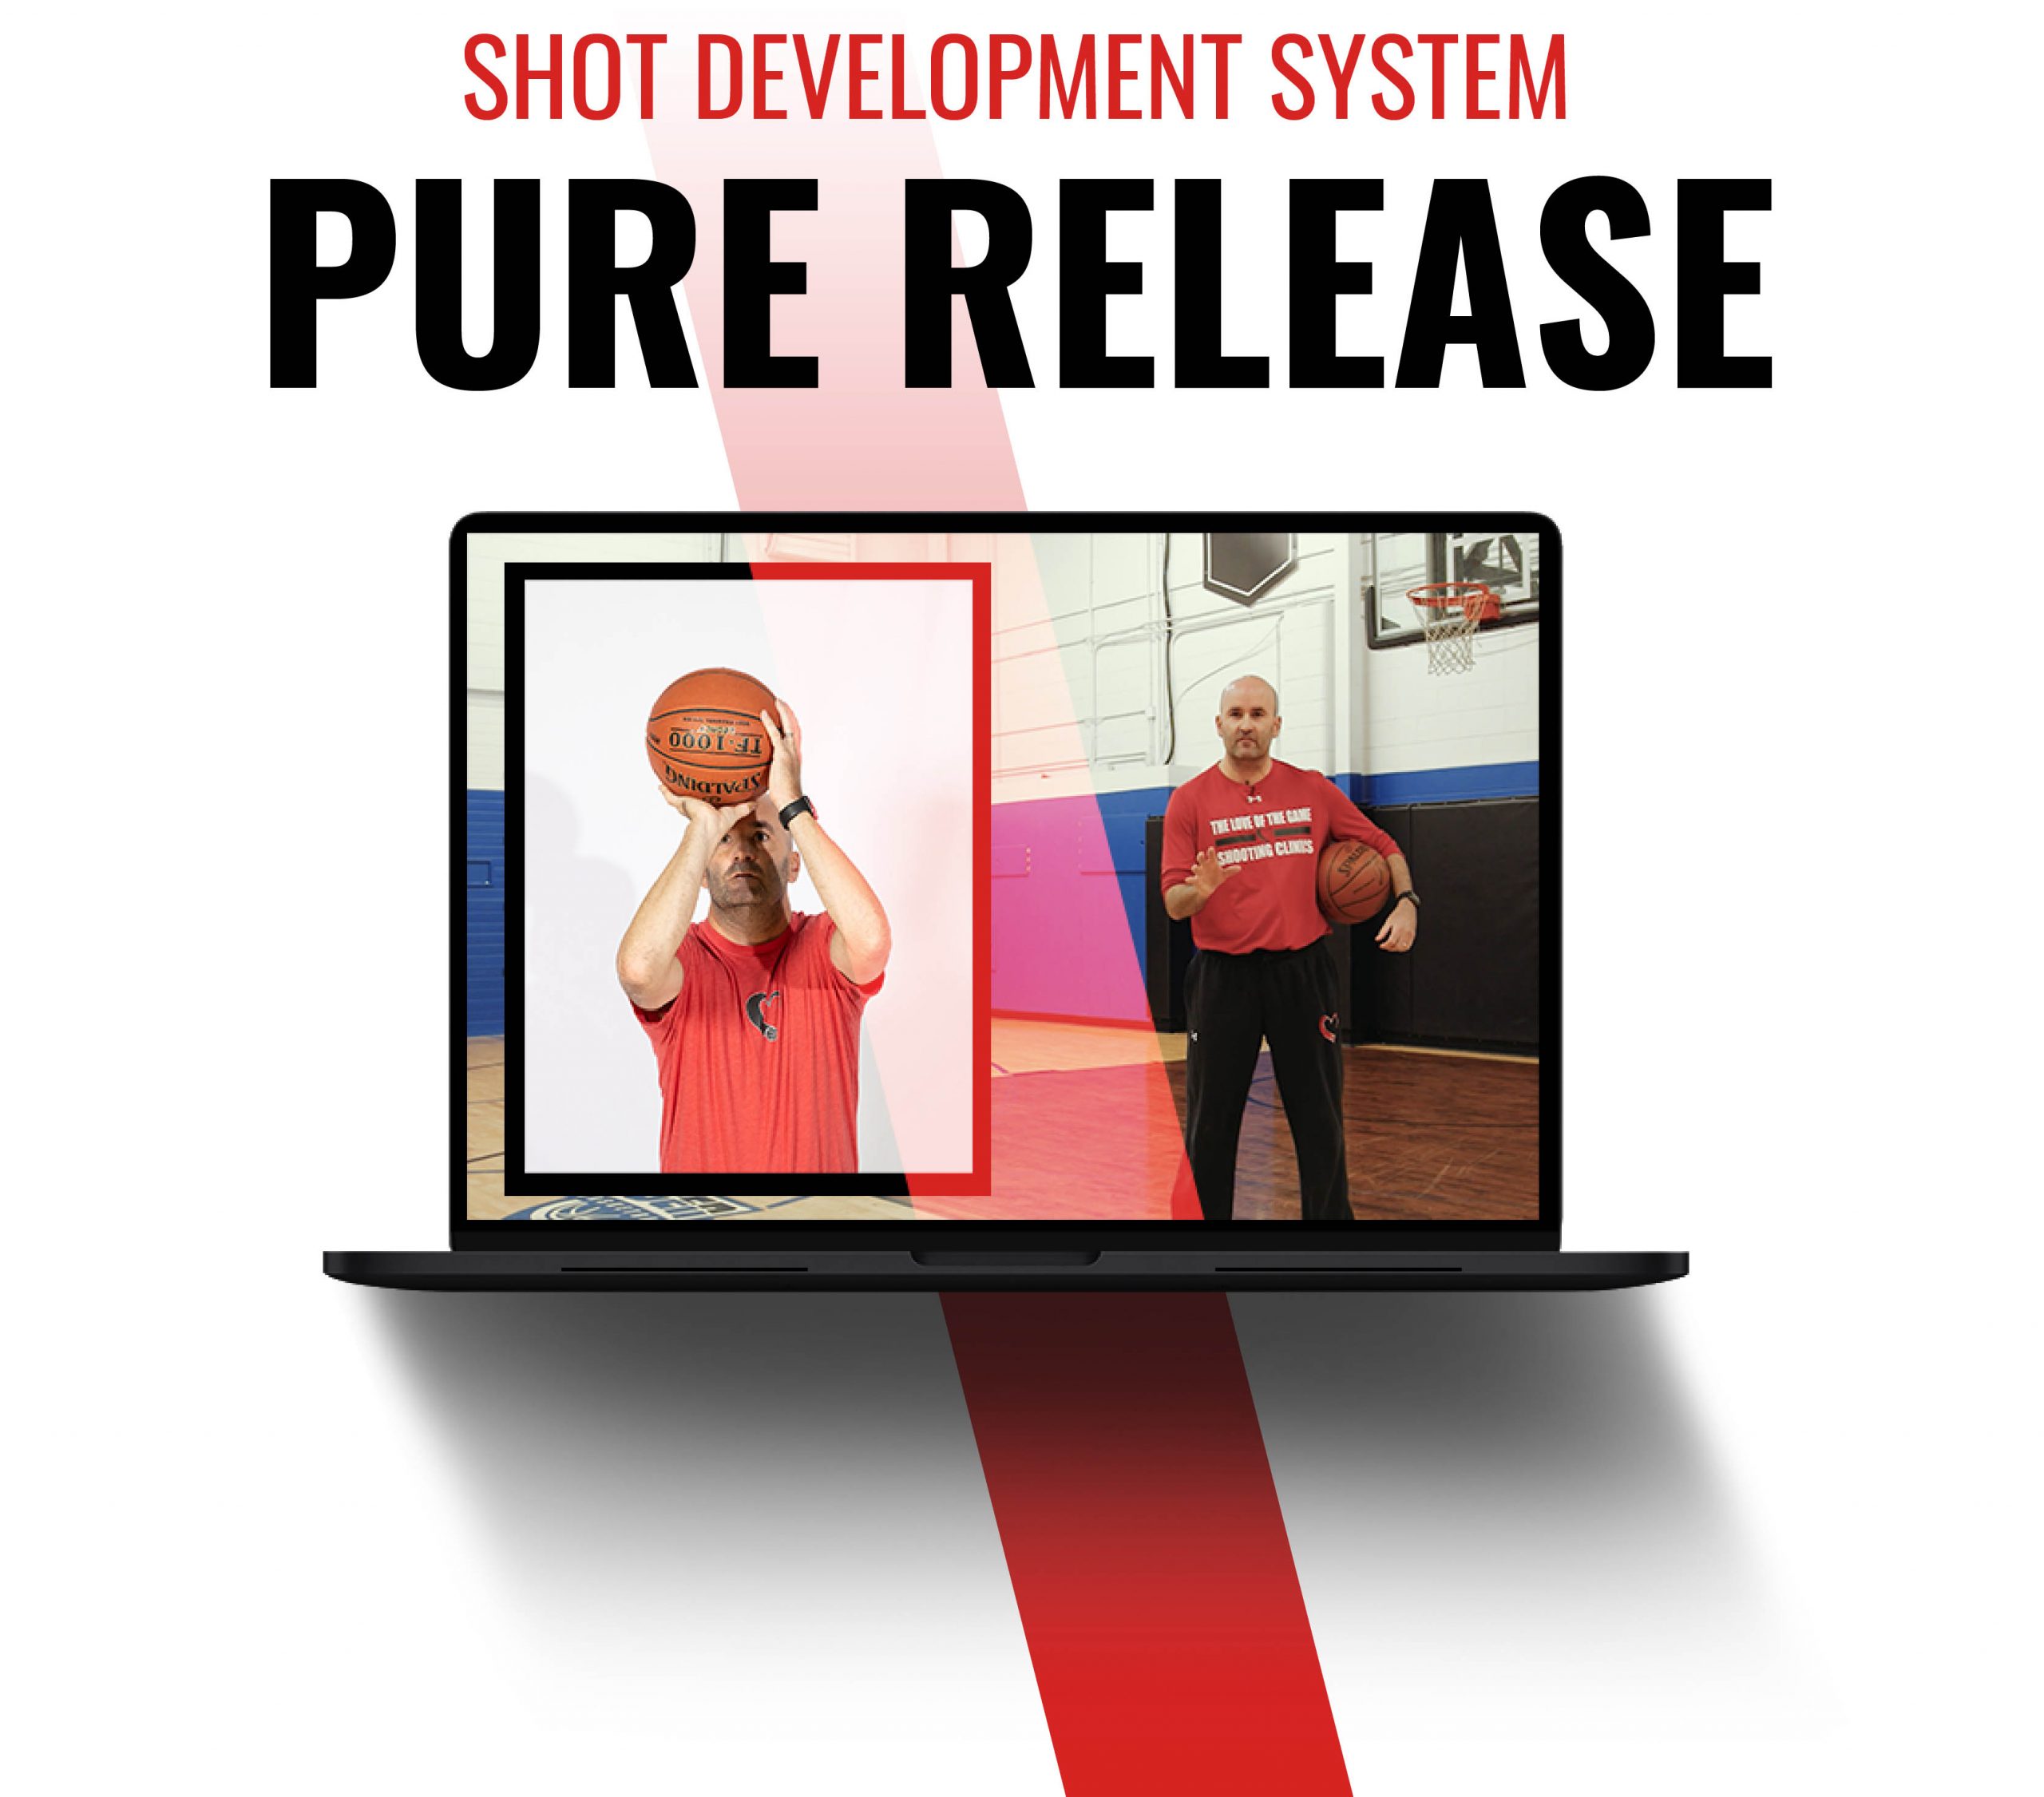
Use these details to start to develop your own system of drills to isolate the habits, and layer drills. Or skip to the front of the line and get my my proven system of drills in my SHOT DEVELOPMENT SYSTEM – PURE RELEASE.
THE GOAL OF THE HANDS
As I’ve mentioned in other posts, our goal when we shoot is to create as much Positive Power in the shooting motion as possible. Positive power is any energy that is straight up and in line with the hoop.
 Since it is your hands that are actually TOUCHING the basketball, it is going to be critical that we create as much positive power with our hands as we possibly can.
We want to avoid the shooting hand pushing the ball off line in one direction and the guide hand pushing the ball off line in the other direction, and then trying to perfectly synchronize those two motions to create positive power. It is POSSIBLE to do, that but the MORE you have compensate, the harder it will be to be consistent.
Instead, try to build a one-handed release with one hand pushing the ball towards the target.
Need help creating positive power but have no idea how to do it? Want to build a true one-handed release? CLICK HERE TO GET MY SHOT DEVELOPMENT SYSTEM – PURE RELEASE.
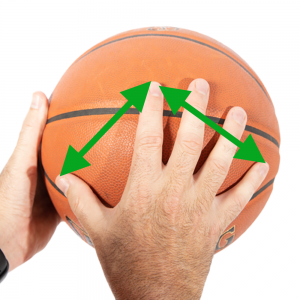
START BY MEASURING YOUR HAND
 This is one of the key building blocks that so many people miss. They build their shot around assumptions, or theory, but not their actual body.
Start by gripping the ball with your shooting hand wide and your thumb comfortably spread out. Place your index finger (pointer, forefinger) on the air valve of the ball. Then place the ball on your hip so that you have your guide hand free. With your guide hand, measure the distance from the tip of your index finger to the tip of your thumb. Then compare that distance to the tip of the index finger and the tip of the pinkie.
I ‘ve measured over 10,000 players hands over the years at camps, clinics, and my own personal workouts. I’ve found that 90-95% of players, when they grip the ball with a wide thumb, the index finger is the middle of their grip. About 5% of players might find that the center of their grip is in between the index finger and the middle finger.
I’ve never had anyone grip the ball correctly and find that the middle of their grip is the middle finger. If you do, make sure that the thumb is spread out wide. If the thumb isn’t wide, your hand won’t be as big as it could be, and won’t control the ball as well as it could.
Need help isolating this important skill, then learning to apply it into games? Click here for my SHOT DEVELOPMENT SYSTEM – PURE RELEASE and get all the drills you need to build the habit!!
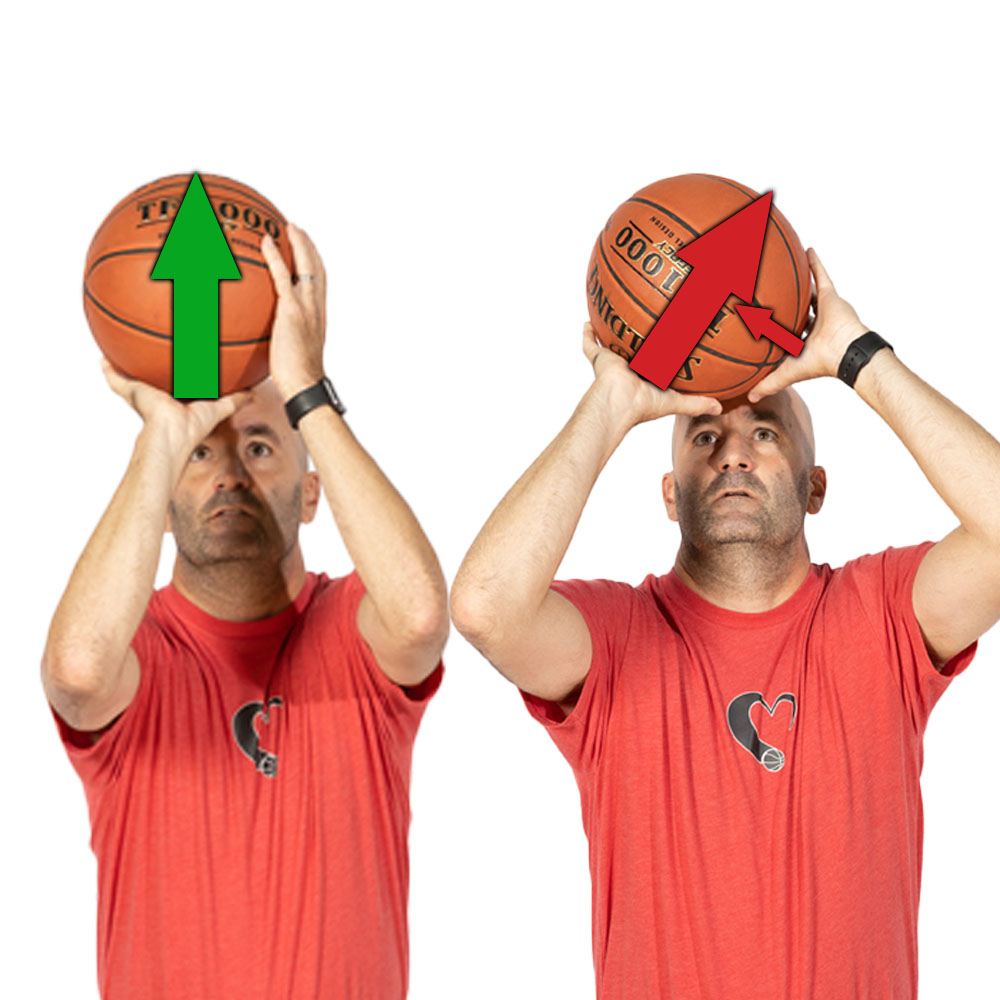
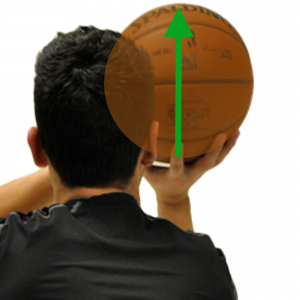
MIDDLE OF THE HAND UNDER THE CENTER OF THE BALL
Once you know where the middle of your hand is, we need to work to get the middle of the hand under the center of the ball.
 Just like in billiards, the ball will go in the opposite direction of where force is applied to it. If your hand applies force to the very bottom of the ball, the ball will go straight up in the air. And if we apply force near the bottom of the ball but slightly to the right side, the ball will go up but slightly to the left – even if we try to lift straight up in the air. Same thing on the other side – if your hand is slightly on the left side of the ball it will push the ball slightly to the right.
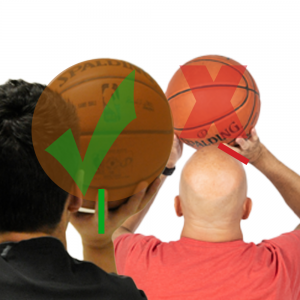
Our goal is to get the middle of the shooting hand under the center of the ball at the release of the ball. To make that easier, we want to get the middle of the shooting hand under the center of the ball at the set point. We may not be able to do this perfectly, but the closer we can get, the more accurate we have a chance to be.
Need some drills for getting your shooting hand under the ball? Then need to learn how to layer drills so you can apply the habit at game speed? GET MY SHOT DEVELOPMENT SYSTEM – PURE RELEASE.
SHOOTING HAND FINGER PARALLEL TO THE TARGET LINE
This is one of the most overlooked keys to shooting. The angle of the finger on the middle of the ball.
 Coaches tend to refer to getting the “elbow in” without realizing why it matters. But let me say this first – the position of the ELBOW doesn’t really matter, the elbow isn’t touching the basketball. We can, however, use the elbow as a cue to get the finger into correct alignment. So saying “elbow in” isn’t WRONG, it just doesn’t fully cover the issue.
When a player can get the finger of their shooting hand parallel to the target line, it will remain on the very bottom of the ball throughout the wrist snap. If the finger isn’t parallel to the target line, it will eventually come off the middle of the ball as the wrist snaps, and push the ball off line.
Also be aware that you can get your “elbow in” too much. It is most common/natural for a right handed shooter to let their elbow relax outward, and the finger to come out of alignment in one direction, but it is equally bad to get the elbow “too far in” and have the finger be out of alignment in the other position.
Do you have a tendency to push the ball off line on your release? Click here to start building a Pure Release.
GUIDE HAND COMING OFF THE BALL AT THE SET POINT
Once the shooting hand is in the correct position, we can focus on getting the guide hand off the ball.
Players and coaches both need to remember that if the guide hand pushes at all, it will push the ball off line. Even if the motion that the guide hand makes appears to push the ball FORWARD, it will push off line since it is on the side of the basketball. The only way you can truly push the ball on line is from the middle of the ball, and there isn’t enough room for two hands there.
So the role of the guide hand is to simply help hold the ball stable in the shooting hand as the two hands lift the ball. At triple threat position, a player needs the guide hand to play a role in holding the ball, otherwise the ball will fall out of the shooting hand. Same thing as the player lifts the ball – if the guide hand is removed when the ball is at chest height, the ball will fall out of the shooting hand because it isn’t under the ball yet.
The guide hand needs to support the ball until the shooting hand can fully get underneath the ball and support it by itself. That occurs around the set point. And that is when the guide hand should start to come off the basketball, though it might not actually release from the ball until a fraction of a second later.
Does your guide hand push the ball off line? Need a progression of drills to help with this? MY SHOT DEVELOPMENT SYSTEM WILL TEACH YOU ALL THE DRILLS I DO WITH MY PRO PLAYERS
GUIDE HAND ON THE SIDE OF THE BALL
The positioning of the guide hand on the ball will play a large role in how easily or how well it can come off the ball.
Keep this in mind… it is POSSIBLE to get the guide hand off the ball or even make shots from ANY hand position. But our goal is to make the movement as simple as possible, because SIMPLE IS REPEATABLE.
So our goal is to find the most simple position that the hand can assist in the lifting motion, but not interfere in the shooting motion. I encourage players to hold the ball so that the guide hand is on the very side of the basketball with the fingers pointed at the ceiling when the ball is at the set point. From that position, all the guide hand has to do it come off the ball a fraction of an inch, and it is out of the way and passive in the shooting motion.
If a player grips the basketball with the guide hand towards the top or front of the ball, the guide hand will need to make a bigger move to release from the ball. The bigger move means more time, and more room for error.
Now, it may be necessary at times to catch the ball with a larger separation in the hands because a catch was challenging and needed to be more secure. But understand that makes the SHOT slightly more challenging. We can work on the skill of catching the ball better, but there will always be some variability in the hand position on catches just because catching and shooting are two different skills, with two different ideal hand positions. Continue to work on the habit of simplifying your hand position, not intentionally making it more difficult.
Need help getting your guide hand off the ball cleanly? CLICK HERE TO GET THE HELP YOU NEED TO MAKE MORE SHOTS.
WHY DOES IT LOOK LIKE SO MANY PEOPLE SHOOT OFF THEIR MIDDLE FINGER?
This is a common question and requires a deeper understanding of shooting form.
First of all, no one’s shot will be perfect, especially in game situations. And being “perfect” doesn’t mean you’ll make every single shot, just like being “imperfect” doesn’t mean you’ll miss every shot. Being better will simply give the shooter a BETTER chance of making each shot.
In order to simplify the shooting motion as much as possible, I’d like a player to get the middle finger under the middle of the ball at the set point, then lift the ball straight up in the air so that both sides are being lifted evenly, and then releasing off the finger that is the middle of their hand.
But many players appear to release the ball off their middle finger? Why?
The shooting motion is short and violent. The wrist is snapping quickly and there is a lot of variability in how the ball leaves a players hand from shot to shot. Even two swishes can come off a great shooter’s hand differently.
This is why I concern myself far more with the position of a player’s hand at the set point, rather than the release.
Secondly, most players don’t hit a perfect position creating ONLY positive energy. They start off with the shooting hand slightly on the right side of the ball (as a right handed shooter) and start the shooting motion pushing the ball slightly to the left. Then, as they lift the ball, the shooter rotates their hand under the ball so that their middle finger is under the center of the ball, more hand is on the left side of the ball, and finish pushing the ball to the right.
This happens all the time, but that small rotation is something we want to try to either minimize or eliminate from the shooting motion.
Have you struggled to be able to do this in games? It might be because you never layered drills so that you could APPLY what you were learning. Finally break the habit once and for all with my SHOT DEVELOPMENT SYSTEM – PURE RELEASE.
HOW DO I BUILD THESE HABITS WITH MY NBA CLIENTS?
Building habits in the grip and release requires attention to detail and patience.
I focus on isolating the habit that needs work. In many cases, this can look like standing close to the rim, taking as much time as needed on each shot, and holding the correct position for a couple of seconds before shooting.
From there, as a player gets better at the new, isolated skill, I will start to layer in other drills to make the situation more like a game. The more their habits progress, the more layers I add.
It is a process that takes a lot of experience, so it is difficult for me to explain in a single blog post.
That is why I created my Shot Development System “Pure Release”. All the drills that I use with my NBA players, laid out in order in video form. Stop guessing what to work on. Start getting results.
You get:
- 60+ Videos of drills and tips
- 2 hours of video content
- Everything laid out in order to remove the guesswork
- Life-time access